My Current Taig Mill Configuration and Changes
What's Different
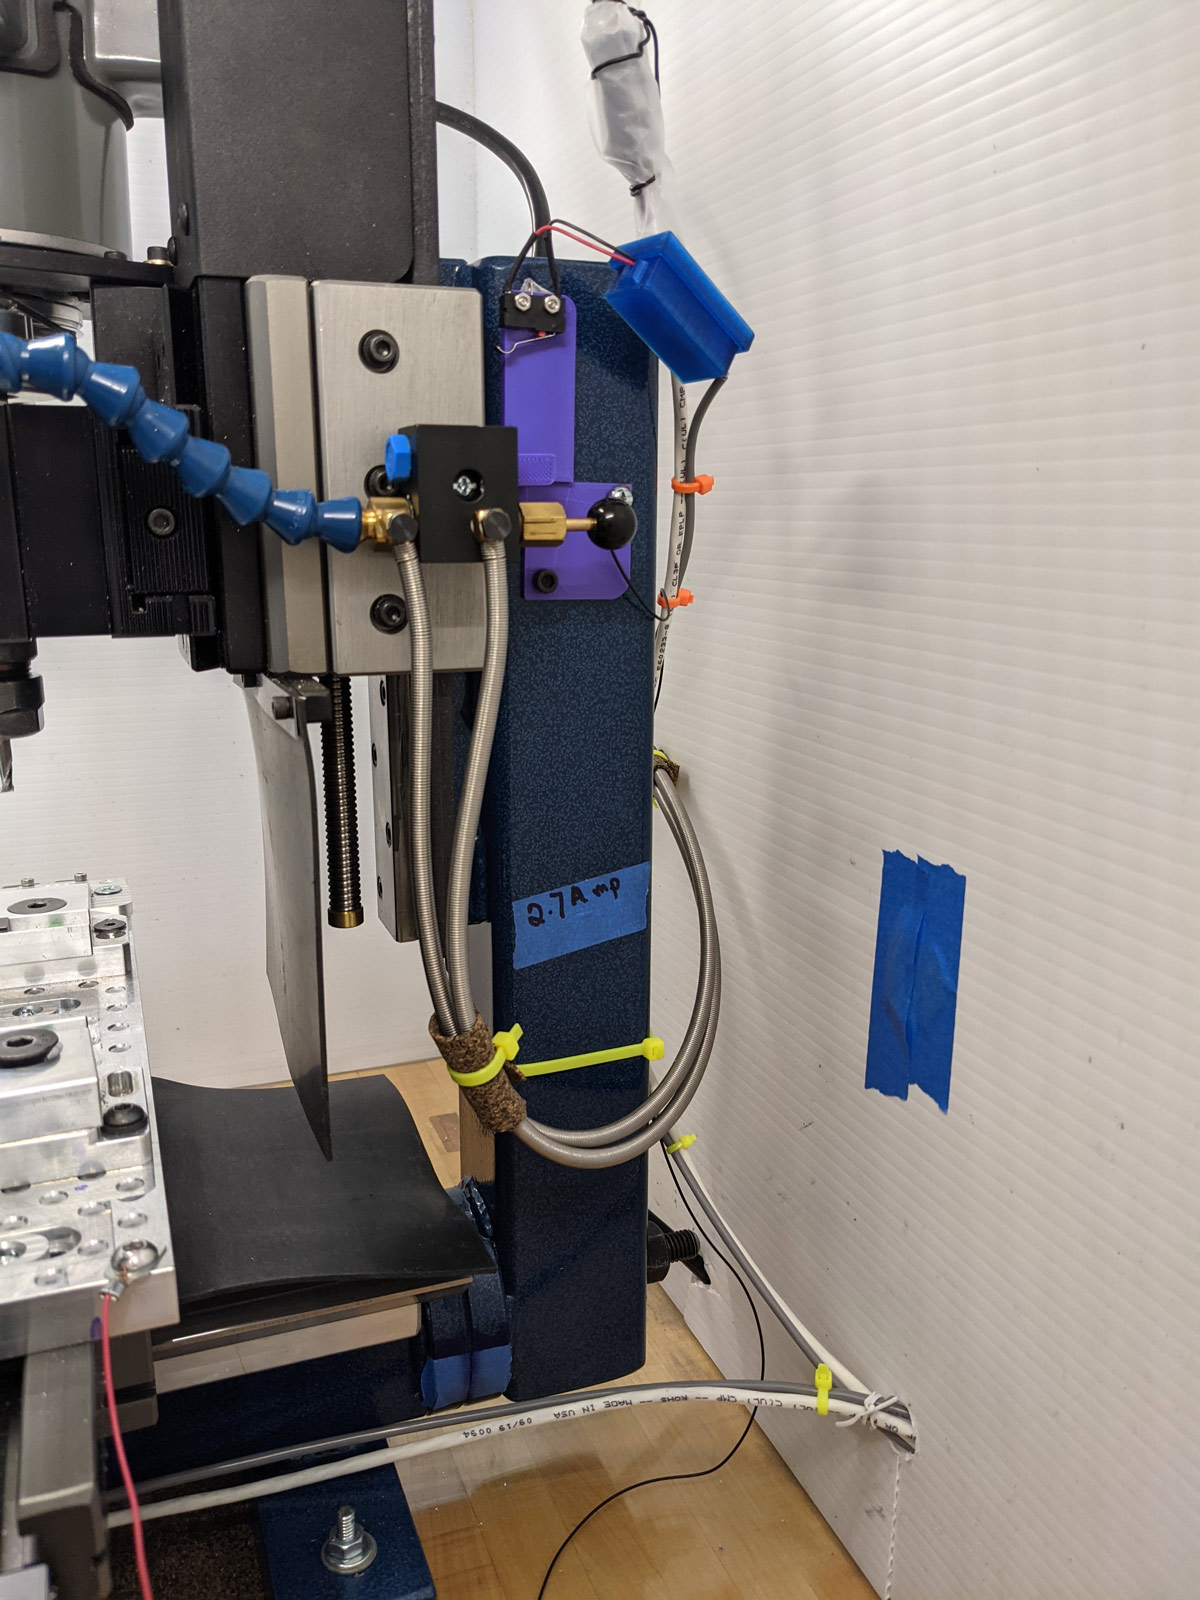
Power Switch
I moved the power switch to the left side of the column. This frees up a well-placed tapped hole for the mister. It also adds a stable viewable spot for the Z-axis limit switch.
Column Rotation
The Taig column rotates if you look at it sideways. The newest Taig can be tightened a lot more than earlier Taigs (a more solid and shorter center) but even with "a lot" of tightening it would rotate a little. A sheet of paper between the mating surfaces seemed to kind of work but clearly was just a stopgap. I ended up wiping a thin layer of Loctite 641. This is magical glue that has incredibly high shear (only) strength - so the columns will not rotate - but could be pulled apart if you had to.
Configuration
Base
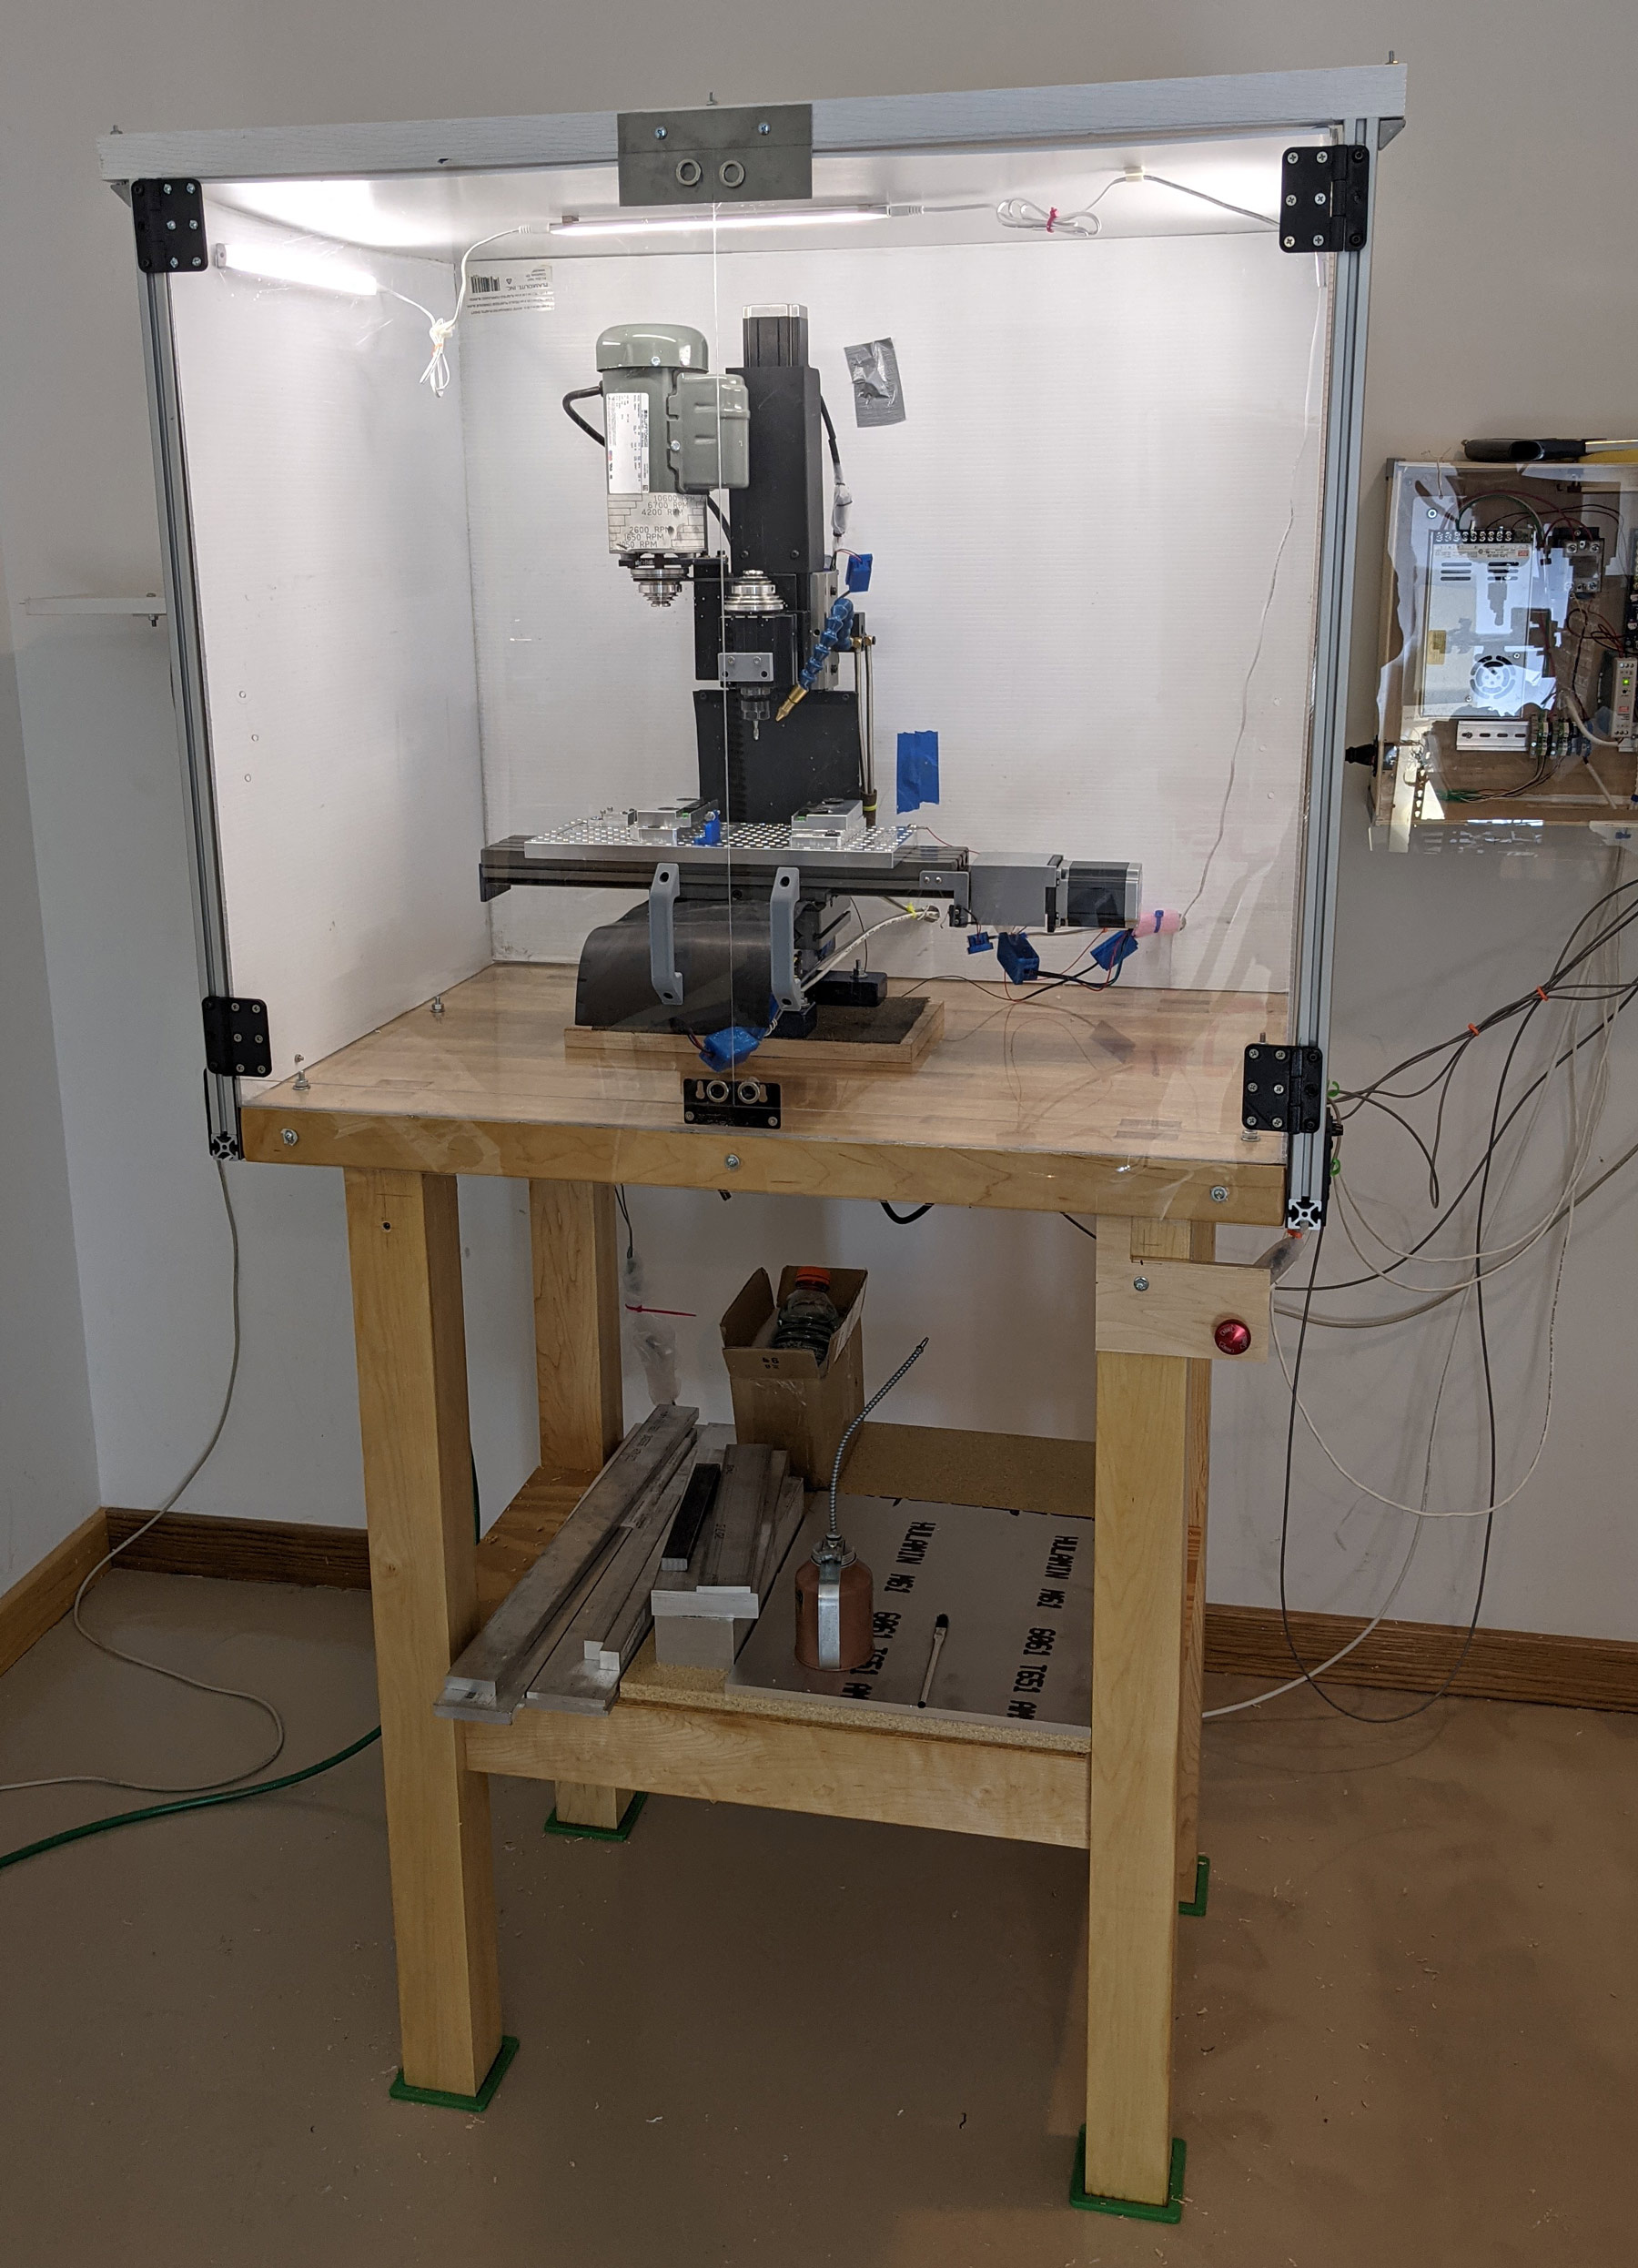
The mill sets on a 2'x3' wood butcher-block table. It is slightly offset (-x, +y) from center so maximize the table movement. The full table movement just barely fits in the 2x3 space (going the entire X to 0 bulges the right wall slightly) but the table is strong enough to support a wider enclosure for future expansion.
On the table top is a layer of Lexan to keep the wood pretty and provide an easy clean surface. The butcher-block sides all have a length of Lexan slightly taller than the wood so liquids won't spill out.
Enclosure
The enclosure is made from 4 Plaskolite Sheets. It's very light stuff, moderately rigid and I'm betting very good against impacts. You could buy one larger sheet for about $30 for the enclosure. The sheets are connected with duct tape.
The enclosure doors are made from Lexan and magnetically close. Two long 2525 aluminum extrusions hold the hinges. The extrusions attach to a shorter 2525 extrusion that is held on aluminum brackets from the bottom of the butcher-block. The extrusions are connected at the top with a plastic beam.
Controller
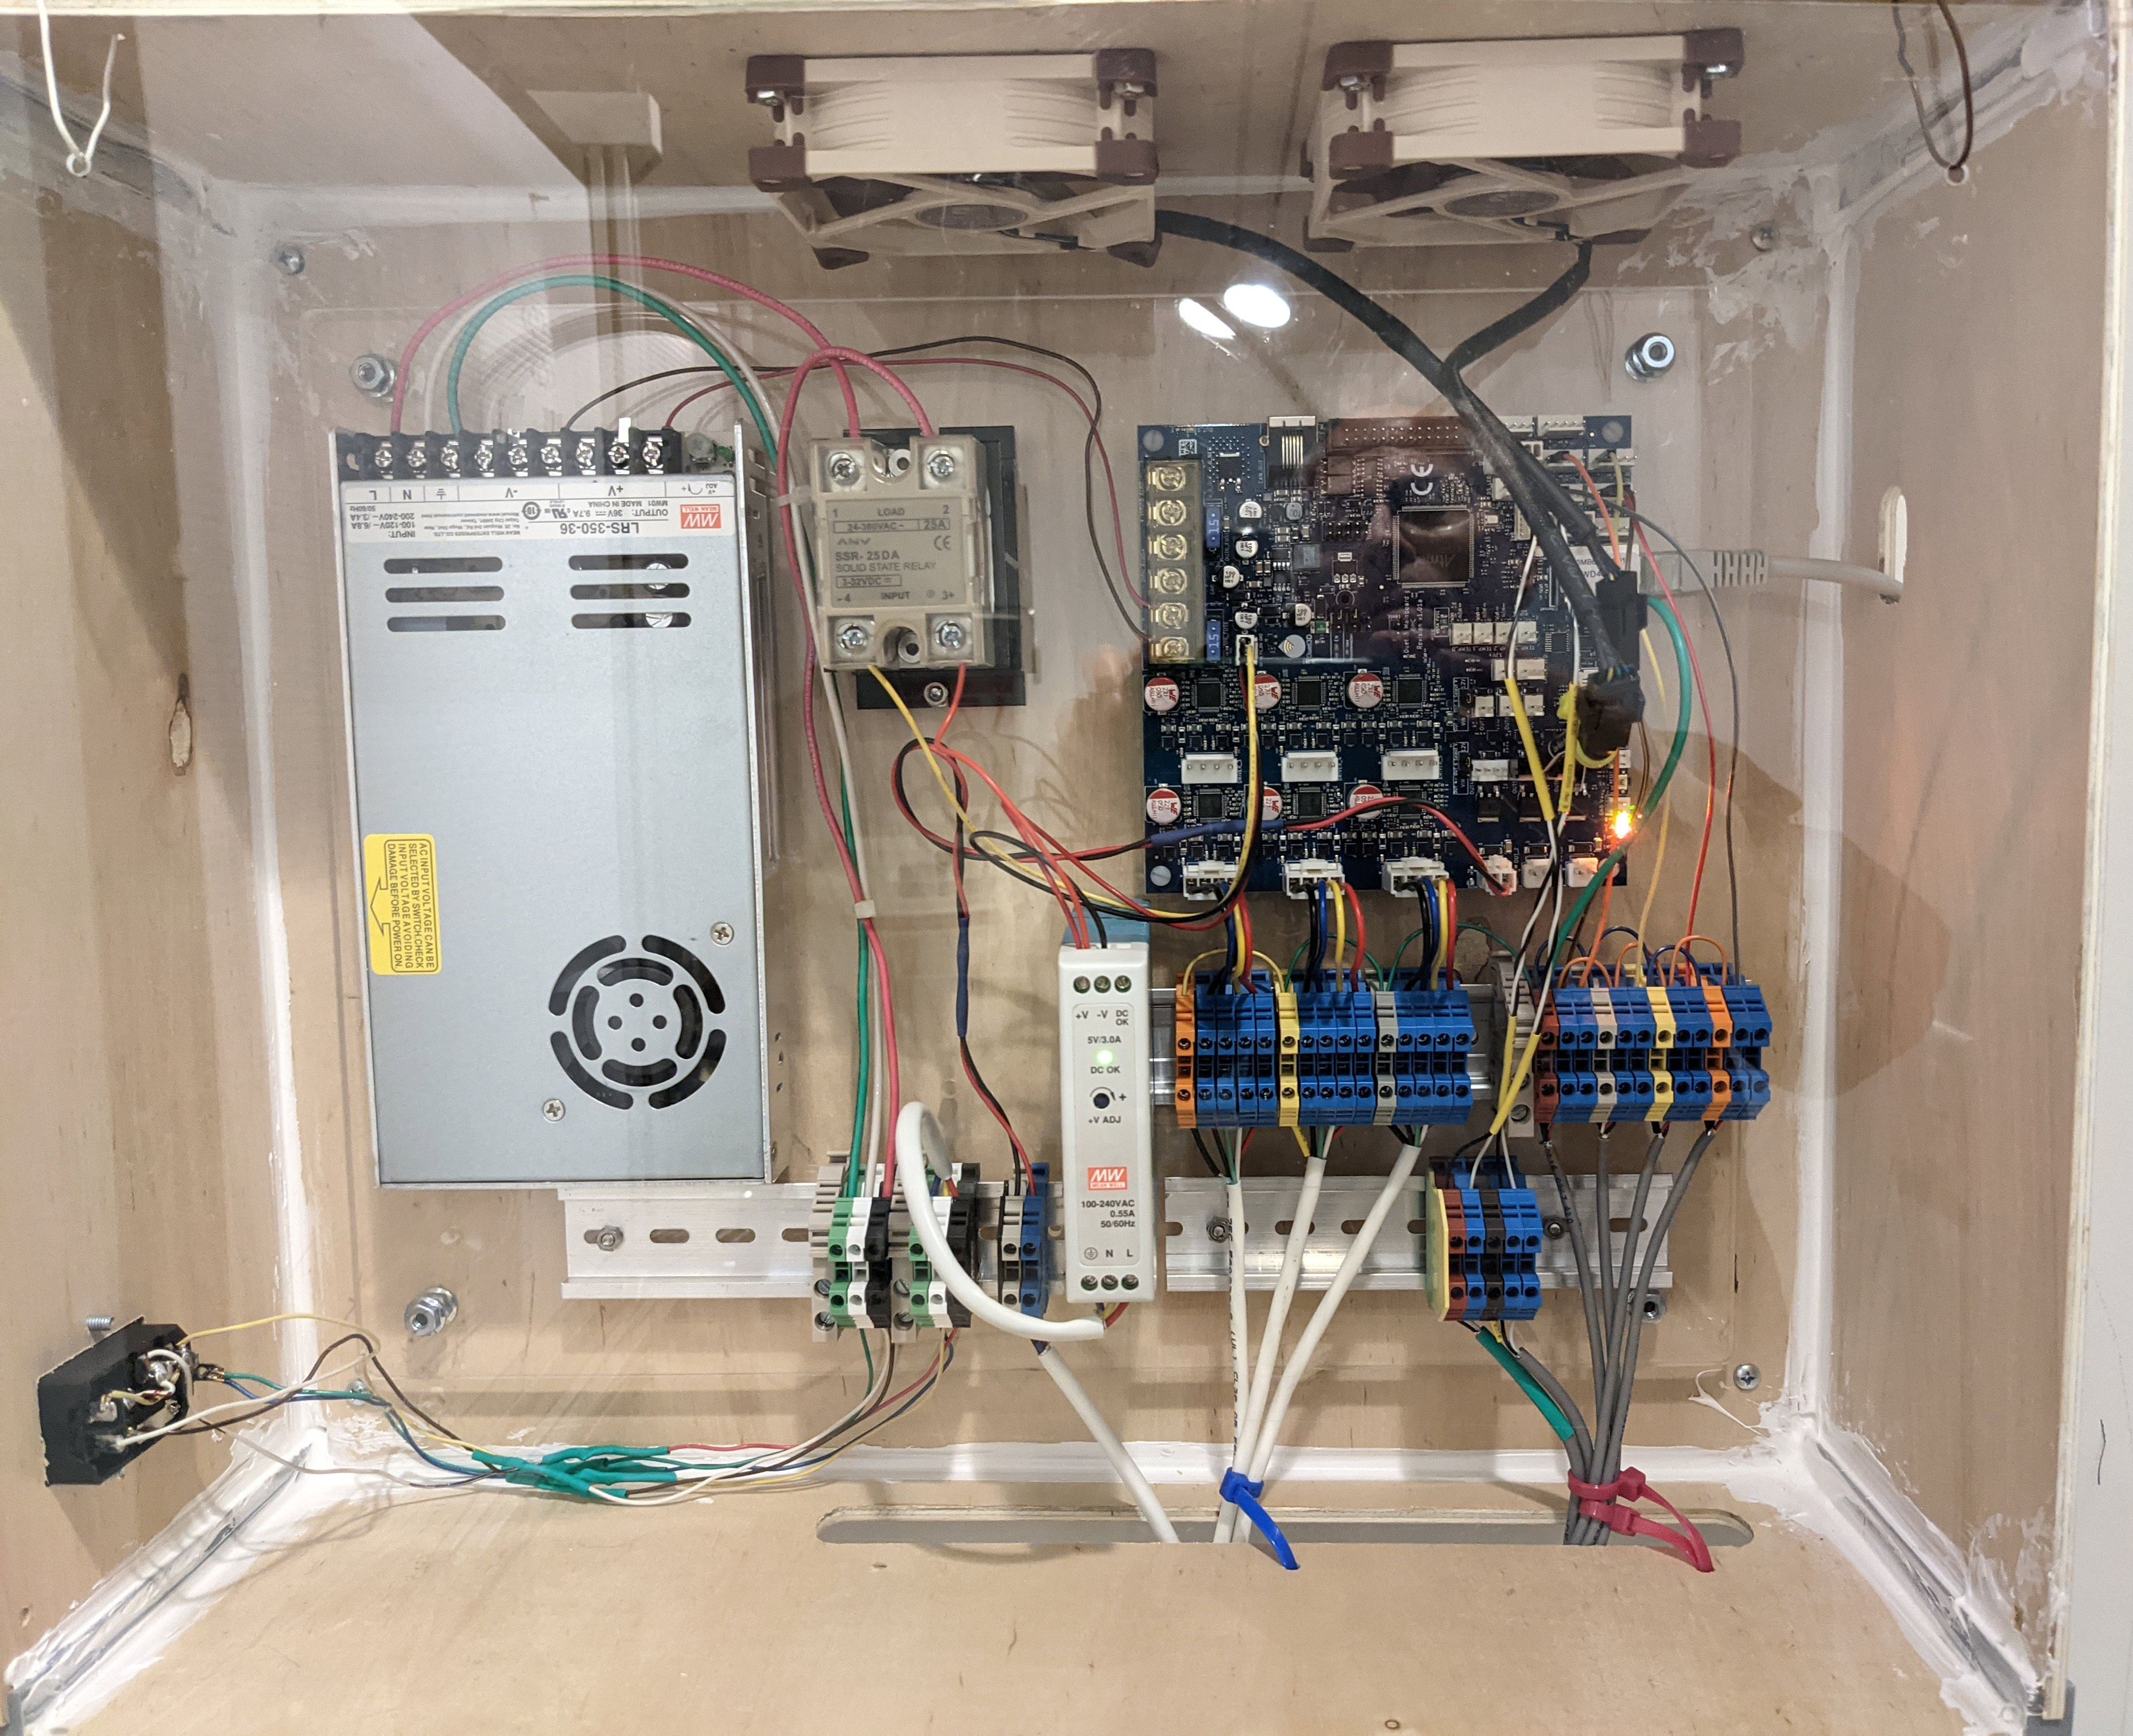
The controller is in a single enclosure that is currently made from plywood and hanging on the wall. The parts are all mounted on a sheet of acrylic.
Some day it'll be a metal enclosure but I have yet to have any noise issues so... plywood is easy. It uses DIN rails mainly to make the wiring orderly. DIN terminal blocks (Blocks) are great.
Wiring
All of the switch and motor wiring is shielded and grounded at the controller board chassis ground. Each component (switch, motor, ...) has a connector inside of a blue 3d printed box to keep out metal filings.
Components:
Duet3 6HC controller board from Duet3d.
This board supports up to 6A and 32VDC. I wish the voltage were higher but otherwise it has worked flawlessly. The software is open-source (my CNC uses a custom version) and remarkably reliable. Although designed for a 3d printer it works wonderfully with the mill. It supports macros with arguments, has a full object model of the system and runs via a web browser from any physical computer in network. The hardware and software fully supports PWM fans as well as numerous configurable digital and analog i/o ports. It connects via Ethernet hardwire. Duet3 6HC
Solid-state power relay
The Duet board supports turning on and off motor power independent of CPU power, so this design uses that to keep the heavy power off when not in use. The CPU stays on 24/7. Solid state relay
5VDC rail-mounted power supply
There is a 3A regulated supply that powers the CPU and the air pumps. Power
Fans
There are two PWM-controlled fans for the enclosure. Fans
Switches
There are 3 limit switches (X, Y, Z) and one Emergency-Stop switch. The system uses conductivity from the bit to the metal stock to detect Z heights and corner X,Y locations. The Taig aluminum bed is anodized and hence an open circuit. The Z circuit is one wire to the bed fixture plate and one wire to the vertical column.